

June 12, 2025
How Professional Photographers Backup Their Photos: A Guide to Foolproof Photo Backup Strategies
Are your treasured photographs safe from the unexpected?
The threat of losing years' worth of photographs from all of your trips is something that no photographer wants to think about - until that fear becomes a reality.
Losing all of your photos can be devastating at best, and cripple your photography business at worst.
In this blog post, I address an often neglected yet critical aspect of photography: backing up your images.
By implementing a robust backup strategy that professionals use, you can protect your photographs from potential disasters, ensuring that your irreplaceable raw files and hard work remain intact.
In this article, we will cover how to effectively back up your photos and never lose a raw file again, including strategies that the pros use and my complete, step-by-step photo backup workflow.
How do professional photographers back up their photos?
In this article you will learn about the best backup strategies for photographers, including:
After finishing this article, you should have an in-depth understanding of the best practices for backing up your data, and a step-by-step photography backup workflow showing you how to do this on your own.
Redundancy, Redundancy, Redundancy: The Key to Never Losing Your Photos

Redundancy refers to the practice of creating multiple copies of your photos, ensuring that even if one copy is lost or corrupted, you have additional backups to rely on. This redundancy is a critical component of a robust backup strategy, providing an extra layer of protection against various potential risks that could threaten your images.
This typically involves storing images on multiple storage devices or locations, ensuring that if one copy is compromised or lost, there are additional copies available for recovery.
Redundancy provides an extra layer of protection against various potential risks, such as hardware failure, data corruption, accidental deletion, theft, or natural disasters.
By having redundant copies of your photos, you increase the likelihood of being able to recover your images in case of an unforeseen event, thus safeguarding your valuable photographic assets.
Implementing Redundancy: The 3-2-1 Rule
A straightforward guideline for implementing redundancy in your photo backup workflow is called the “3-2-1” rule.
The 3-2-1 backup rule is a widely recommended strategy for backing up any kind of data, including photos.
It's a simple framework commonly used by professionals who need a robust backup system that can withstand various types of data loss scenarios, such as hardware failure, accidental deletion, fires, or any other unforeseen circumstances that can lead to data loss.
The 3-2-1 rule entails that you keep at least three copies of your data, on two different types of storage media, with one copy stored offsite.
Let’s break each of these guidelines down:
- 3 Copies of Your Data: The first part of the rule emphasizes having at least three separate copies of your data. This means you should have your original photos stored on one device and two additional copies elsewhere. These copies can be on different types of storage media or locations to reduce the risk of all copies being affected by the same event.
- 2 Different Storage Medium Types: The second part of the rule emphasizes diversity in storage mediums. It suggests storing your data on at least two different types of storage media. For example, you might have one copy on your computer's hard drive and another on an external hard drive, a network-attached storage (NAS) device, or a cloud storage service. This helps guard against failures that might affect one type of storage medium but not the other.
- 1 Offsite Backup: The third part of the rule emphasizes the importance of having at least one copy of your data stored offsite, meaning it's kept in a different physical location from your primary storage devices. This could involve using a cloud storage service, storing backups at a friend's or family member's house, or using a secure offsite storage facility. Offsite backups protect against catastrophic events like theft, fire, or natural disasters that could destroy all copies of your data if they were kept in a single location.
By following the 3-2-1 rule, you create a backup strategy that provides redundancy, resilience, and protection against various potential risks to your photography data. It ensures that even if one copy of your data is compromised or lost, you still have multiple backups available to restore from, minimizing the likelihood of permanent data loss.
Backup Starts in The Field
Before we jump into my recommended strategies and step-by-step workflow for backing up images, I want to first mention an aspect of photo backup that is often overlooked.
Even if you have a robust backup workflow that you follow after you upload all of your photos to your computer, there’s a chance that you could still lose some or all of your images before you even get home if you don’t have a backup strategy while you are in the field or on the road.
When I’m on multi-day backpacking trips in remote wilderness areas where I don’t have access to my computer or external hard drives, I have to take every precaution possible to prevent losing my precious photos that often take my blood, sweat, and tears to make (these images are essential to my business, not to mention, too).
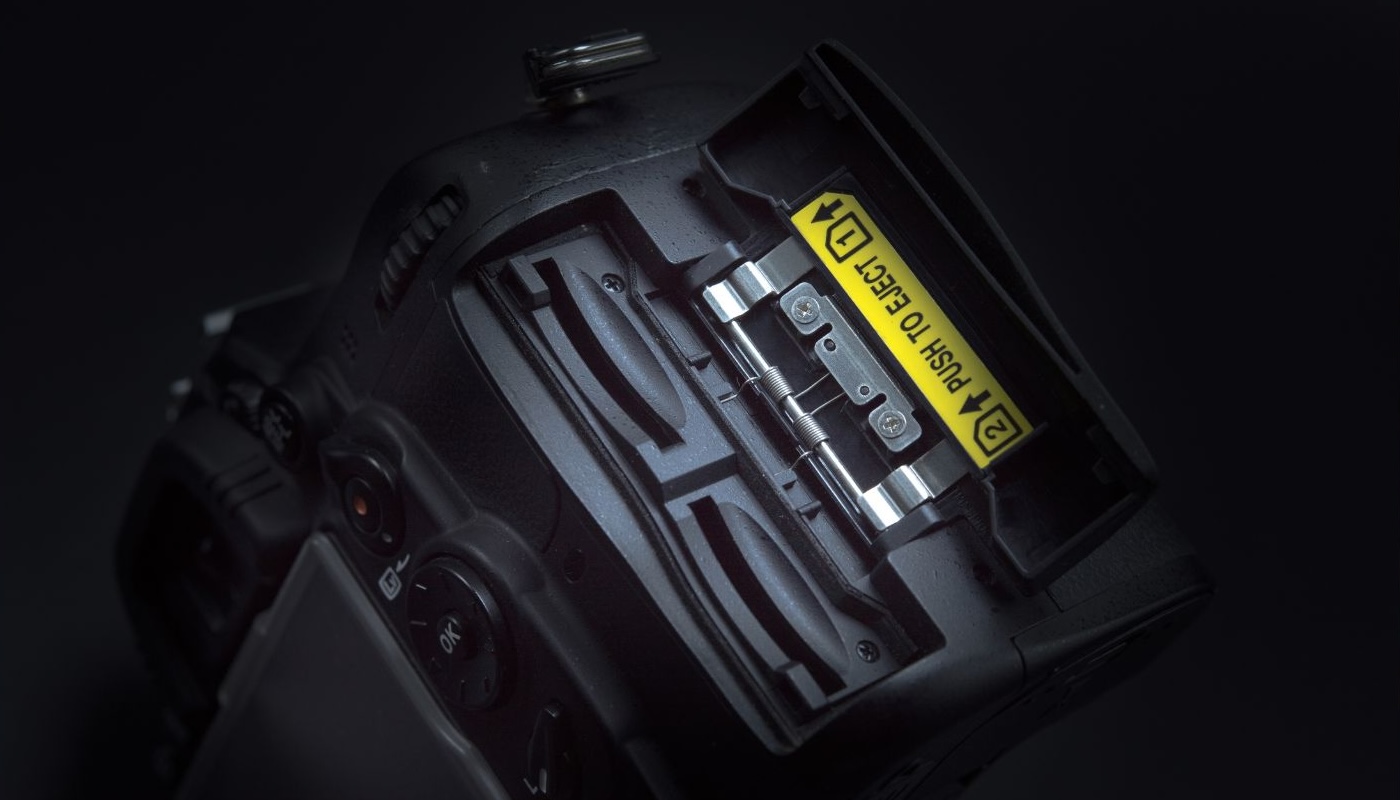
For this reason, I always use two memory cards: one main card which is a durable and reliable CFexpress card, and one SD card as a backup memory card.
Most modern DSLR and mirrorless cameras have two memory card slots, and I highly recommend that you utilize them both. In your camera settings, you can set the second card slot to act as a backup (not overflow) memory card.
When you utilize two cards and set one as a backup, each photo is simultaneously written to both cards, ensuring that if one card fails or becomes corrupted, the other card still contains all the images.
This provides redundancy and safeguards against potential data loss if one card were to get corrupted or malfunction.
As a final note, if you opt to not use two cards, at least use a CFexpress or XQD card if your camera can accept one of those types. These types of memory cards are more expensive than SD cards, but they are typically more reliable and durable than SD cards (SD cards are more likely to fail).
Backing up at Home: Your Best Options
When you get home from a trip or photo shoot, you should immediately transfer and backup the images from your memory card onto your computer’s hard drive and/or other locations for safe storage.
This is when you should also implement the 3-2-1 rule. I will walk you through exactly how I do this in my workflow below, but let’s first cover some of the best options available for storing your photos.
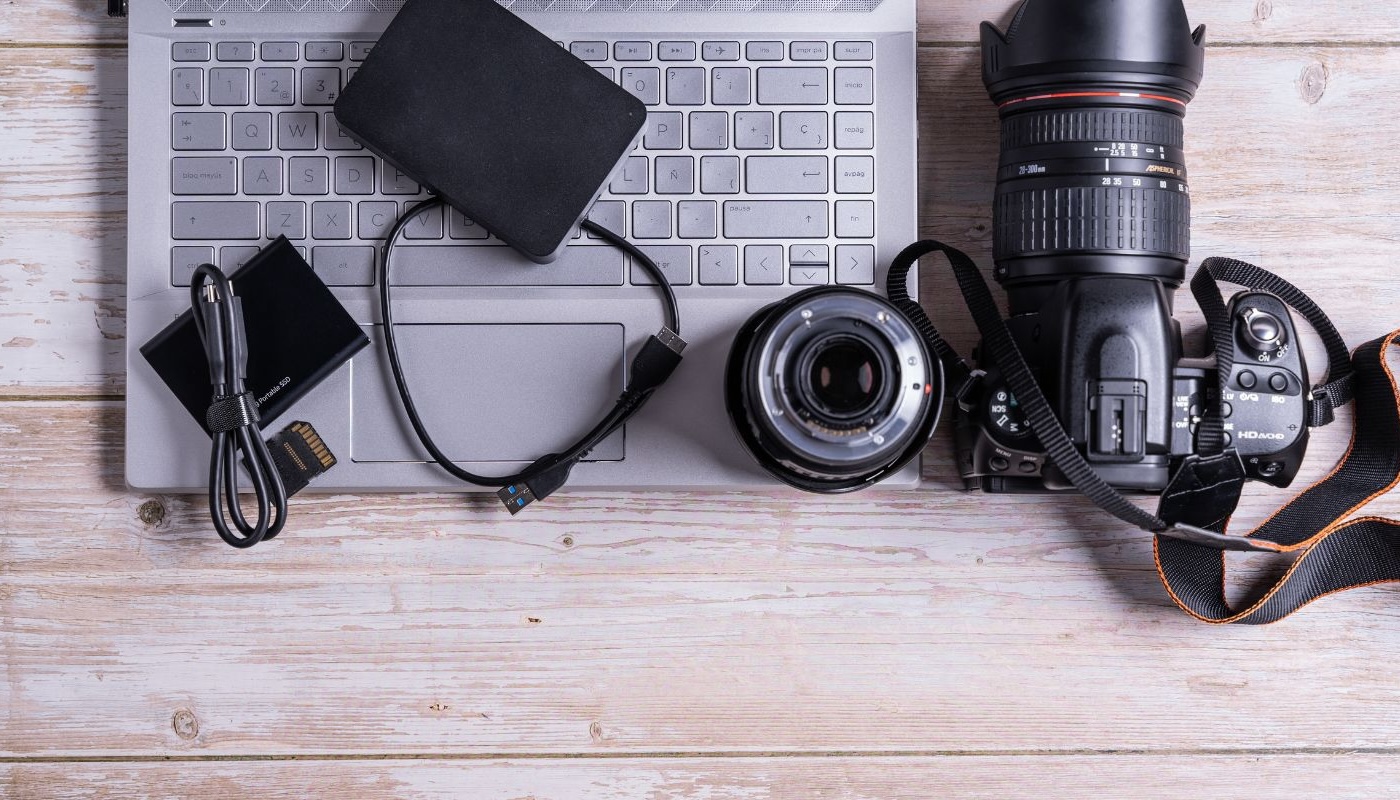
There are lots of devices and services out there that you can use to store your photos, but the most common ones used by professional photographers include:
1. Hard Drives
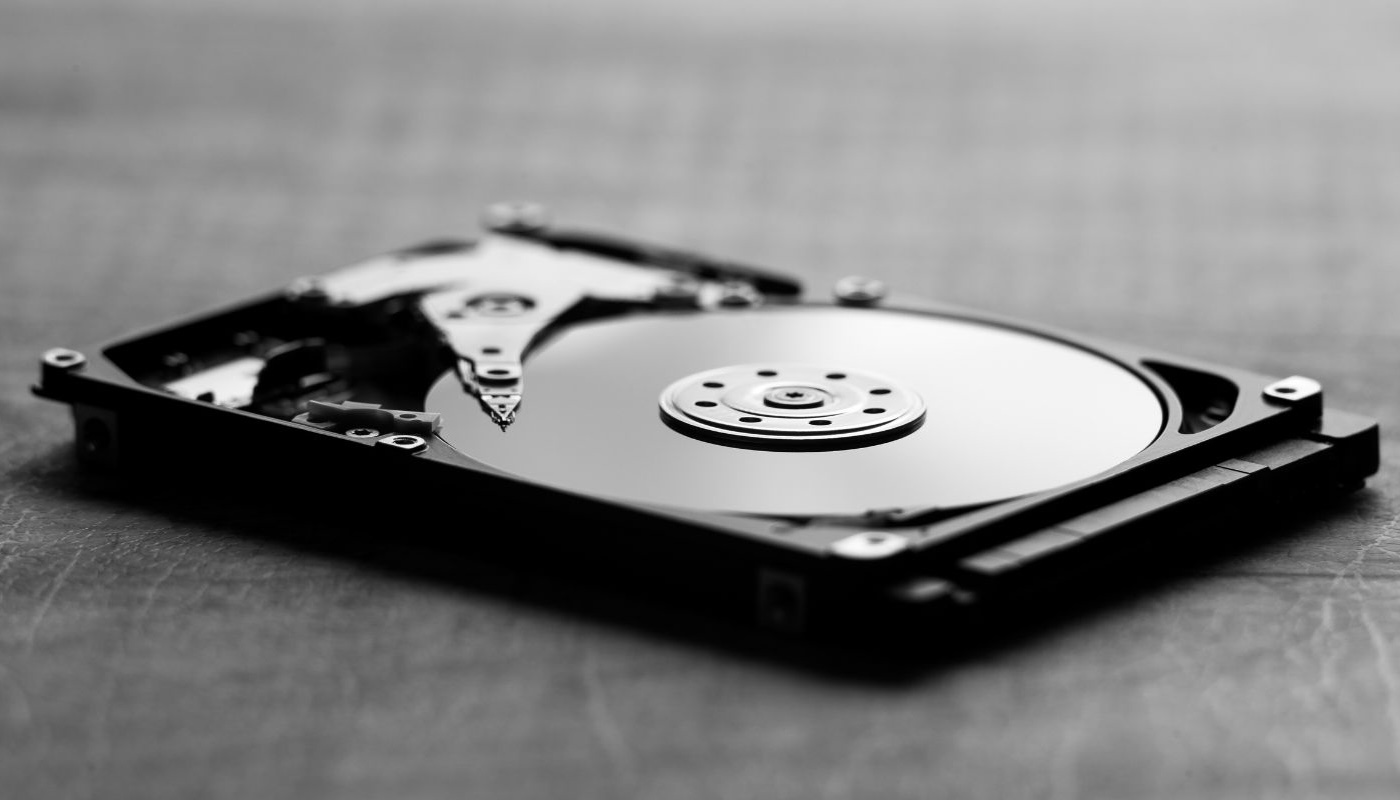
Hard drives are a type of hardware used in computers and other electronic devices to store and retrieve digital data.
Photos, documents, videos, music, and programs are common types of digital content that are stored on hard drives.
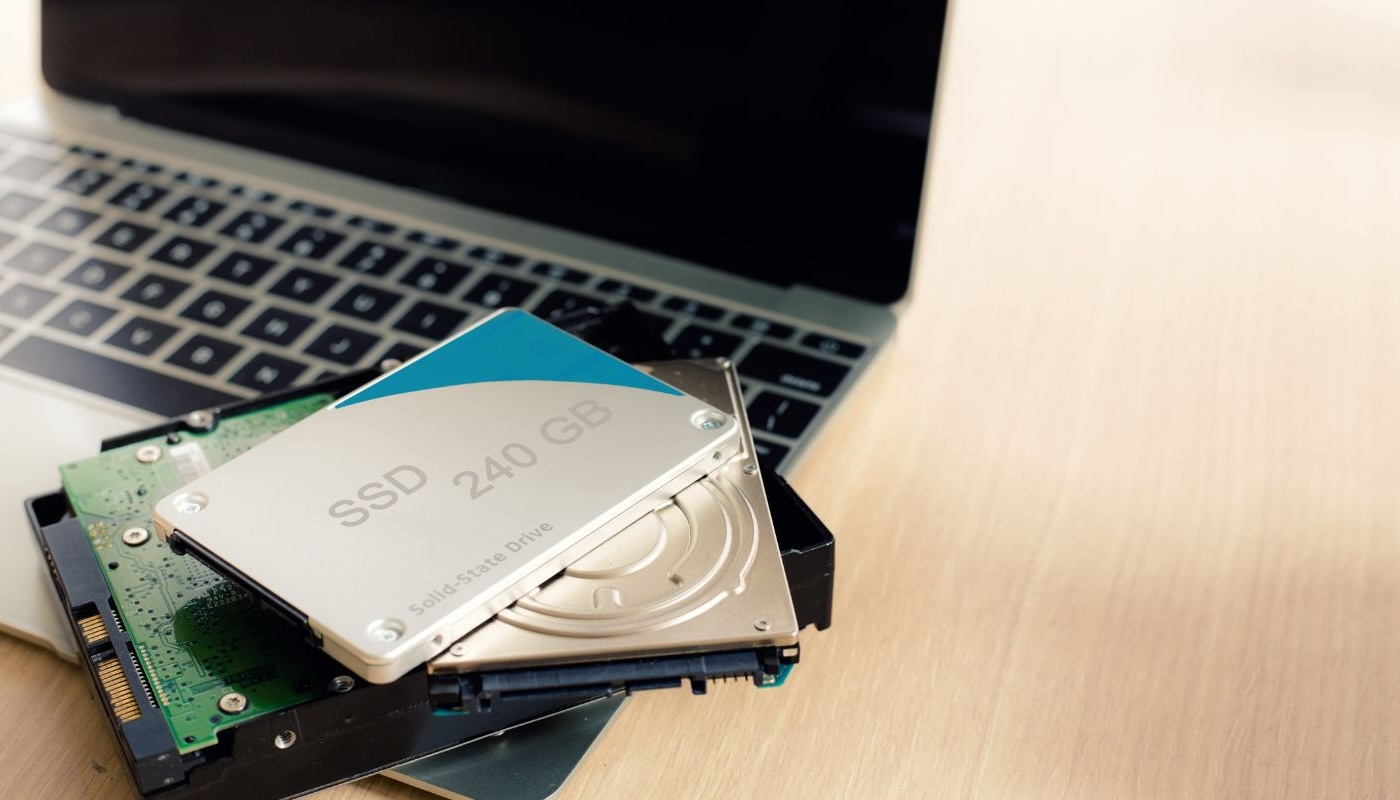
There are two different types of hard drives used as data storage devices inside computers that you should be aware of:
- hard disk drives (HDDs) - these drives are slower but cheaper and good for long-term, “cold” memory storage (i.e. files that you will not need to access often).
- solid state drives (SSDs) - these drives are faster but more expensive and good for “hot” data storage (i.e. files that you need to use and access often transfer quickly).
Without getting too technical, these two types essentially do the same things (i.e. store data) but in different ways. They both have their uses in a photo backup strategy as you will learn later.
Hard drives can be internal (i.e. inside of your computer) or external (i.e. outside of your computer):
Internal Hard Drive
An internal hard drive is the hard drive built inside of your computer. It is a physical device that stores and manages digital data inside of the computer like files (e.g. your photos and documents) and programs (like Lightroom and Photoshop). This storage is non-removable and directly connected to the computer's motherboard.
Think of an internal hard drive like a closet in your house. You store your photos on a hard drive similar to how you store boxes of your stuff in a closet.
Like closets, hard drives have a limited amount of storage space. When you fill up a closet, you will have to either clean it out or get a new closet if you need to store more stuff. Likewise, you will need to get more hard drives (or use other storage locations) to store your files if you fill up a hard drive.
When you import large photo files (like raw files) onto your computer’s internal hard drive, it can quickly fill up the storage space on your hard drive.
The major problem with this is that it can significantly slow your computer down. Aim to keep 50% of your computer’s internal hard drive memory empty if you want your computer to run optimally. For example, if your computer’s hard drive is 500 GB, try to keep 250 GB free if you want to run optimally.
External Hard Drive
If you shoot photos in the raw file format (which I always recommend), you probably already know that you need a lot of memory to store your photos.
Raw files, especially from full frame, high resolution cameras, are typically very large files that will quickly take up all of the space on your computer’s internal hard drive.
For this reason, I do not recommend ever storing your photos on your computer’s internal hard drive.
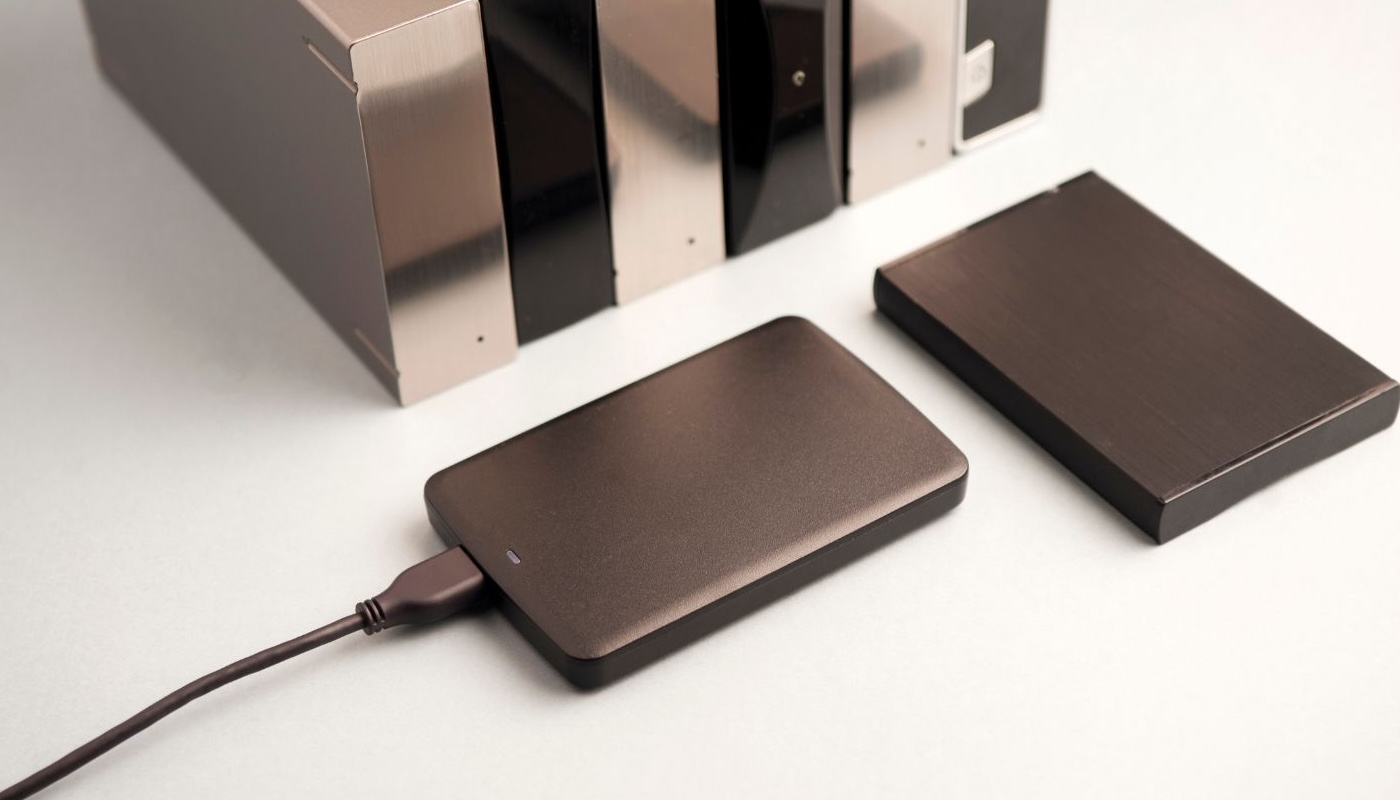
The much better option is to use external hard drives to store and manage all of your photos/raw files.
External hard drives are standalone storage devices that are designed to provide additional storage capacity for computers and other devices.
Unlike internal hard drives, which are installed within a computer's casing, external hard drives are housed in enclosures and connected to a computer or device via a wire, like a USB or Thunderbolt cord.
If the internal hard drive on your computer is like a storage closet in your house, then an external hard drive is like a storage unit where you keep all of your stuff away from your home.
External hard drives can store massive amounts of data for a relatively cheap price. You can easily find external hard drives that can store multiple terabytes of data - much more than the typical internal hard drive can store.
Like internal hard drives, there are generally two types of external hard drives: HDDs and SDDs.
I recommend that you back up your photos on at least 2 external hard drive hard drives. These can be two SDDs, but I recommend HDDs for long-term storage because they are cheaper.
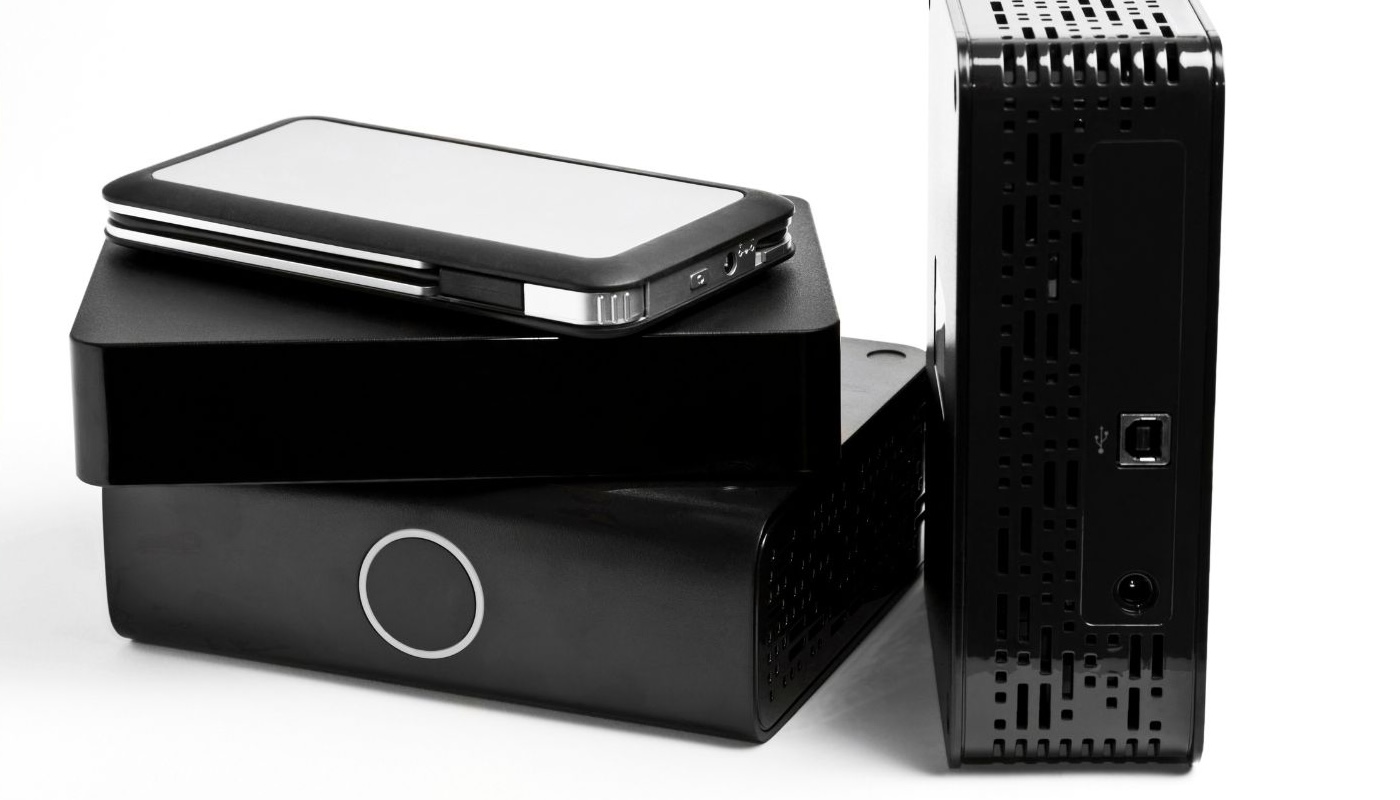
2. Hard Drive Enclosures

The second device that you will commonly find photographers using to back up their photos is a hard drive enclosure.
A hard drive enclosure is typically a stand-alone unit made of metal or plastic that stores and protects one or more external hard drives.
The drive enclosure essentially serves as a storage unit that can hold large amounts of data. It works similarly to an external hard drive but with multiple drives instead of one.
It can be plugged directly into your computer using a USB or Thunderbolt cable, just like you would a single external hard drive. When you plug the enclosure into your computer, you will see all of the drives in the bay appear in your file manager (e.g. Finder on a Mac or Explore on a PC) as individual external drives.
Because an enclosure can hold two or more hard drives, it gives you the ability to use and manage multiple drives at once. This is ideal when you want to sync multiple drives together, such as when you want to take photos on one drive and back them up onto another drive. It also will allow you to use RAID configurations to enhance your data protection.
The enclosure will usually have “bays” where each hard drive can be docked and removed. This is extremely useful because it allows you to add or swap out drives if they fill up or become corrupted.
It also means you can use drives from your preferred manufacturer, as long as they are compatible with the enclosure.
I use a drive enclosure to sync and store my photo backups on HDDs. More on this later - including the exact enclosure and drives that I use - when I go over my step-by-step backup workflow.
3. Network Attached Storage (NAS)
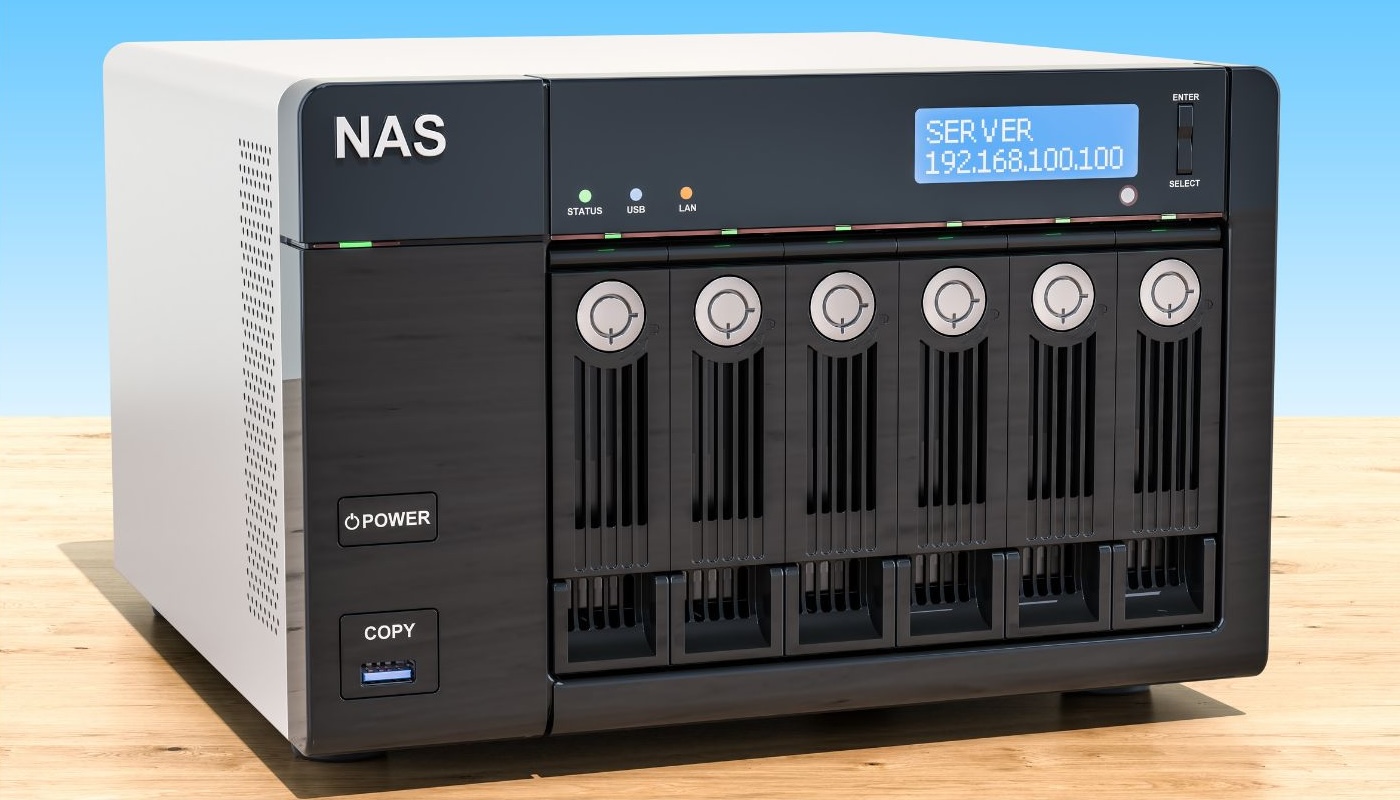
A third option for backing up, storing, and managing your photos is called a NAS (or network attached storage).
A NAS is a type of storage device that is similar to a drive enclosure in that it holds multiple hard drives and connects them together, but there are a few key differences.
NAS devices typically connect to a network, such as a local area network (LAN) or a wireless network, using Ethernet cables or Wi-Fi. This allows multiple users or devices to access the stored data simultaneously.
Because of this connectivity feature, you can essentially create your own “cloud” that stores all of your photos and other data that is accessible from anywhere in the world, as long as you have an internet connection.
A NAS is a great upgrade from a drive enclosure if you want to have your photos accessible from anywhere, and/or if you want to give access to your photos to multiple people (e.g. you want to collaborate and share access to your data).
Many NAS devices support RAID (Redundant Array of Independent Disks) configurations, which provide data redundancy and protection against disk failures. In case of a disk failure, RAID allows the NAS to continue functioning without data loss. I won’t go too much into RAID here as it’s beyond the scope of this article, but you can learn more about how they work here.
The upfront cost to purchase a NAS and the drives for the NAS can easily cost you $1,000 or more. The good news is that you can use NAS compatible hard drives in a drive enclosure (like I do), and eventually upgrade to a NAS and still keep all of your drives.
As a solopreneur who works from home, a NAS isn’t something that I have personally felt the need to invest in (yet). The drive enclosure used in my backup workflow (below) is sufficient for my needs and data backup practices.
4. Cloud

The fourth option for photo backup we will cover here is one that you will likely be more familiar with.
Cloud backup storage refers to the practice of backing up data to remote servers hosted on the internet, often provided by third-party service providers.
Unlike traditional backup methods that involve storing data on physical devices such as external hard drives, cloud backup utilizes the infrastructure and resources of remote data centers.
Most people are already backing up data from their phones and computers automatically on cloud services like iCloud, Google Drive, and Dropbox. Many of these services will store your data for free up until you reach a specified limit (e.g. 10 GB), and then charge you per month if you want to store more.
There are many advantages to using cloud backup services, one of the main ones being its accessibility and convenience. You can securely upload your photos to the cloud from any location with an internet connection, eliminating the need for physical storage devices and allowing for easy remote access to backed-up data.
Cloud storage is a great option fulfilling the “2” and the “1” in the 3-2-1 rule. It is a different type of medium for storing your files than a physical hard drive. It is a safe way to keep your photos off-site that is also very unlikely to be affected by theft or natural disasters.
The main downside to using cloud storage is that if you have large amounts of data to upload to the cloud, it can take an extremely long time to upload if you don’t have access to fast internet speeds.
There are many great options out there for cloud storage, and the one you choose depends on your personal preferences and how much you want to spend.
I use Amazon Photos because, at the time of writing this, you get unlimited photo storage included in an Amazon Prime membership. It’s an amazing deal if you are a Prime member because most cloud storage services (see options below) usually charge between $5-$10 per terabyte per month and this can get quite pricy if you have tons of data.
If you are interested in using cloud storage for your photos, some of the best options include:
- Backblaze (many photographers use and highly recommend Backblaze for cloud storage, but I have not used this service yet)
- Google Drive
- iCloud (Apple)
- Dropbox (best for sharing files and not necessarily photo storage in my opinion)
- Amazon Photos (their free photo storage is a great deal if you are a Prime member)
I didn't use cloud storage for a long time because I have methods for implementing the 3-2-1 rule without it. However, because I have Amazon Prime, it makes sense to take advantage of their unlimited photo storage service as one additional backup of my work. You can’t have too many backups!
An Overview of My Backup Recommendations
With all of these options, it can get a bit confusing or overwhelming when you are trying to figure out the best way to back up your photos.
Before taking you through the exact backup workflow that I use (which you can copy and use for yourself to make it easy), here is a brief overview of the different backup options and combinations you might want to use to implement the 3-2-1 rule given your unique needs and situation:
- If you work out of a home office and don’t need access to all of your raw files while on the road, then a hard drive enclosure with at least 2 hard drives (and a third drive kept off-site) is a relatively cheap, easy option that works great to store all of your photos.
- If you have a fast internet connection and don’t mind paying a monthly subscription service that will increase as your data increases, a cloud service is a very safe and reliable location to store your photos off-site. Combine this with at least one external hard drive or a drive enclosure to have extra copies of your data on a different medium.
- If you have fast internet, share your photos with others, want access to all of your photos on the road, and don’t mind spending lots of money on a backup system, then a NAS is the way to go.
My Photography Backup Workflow
This is the exact series of steps that I take once I come home from a photo shoot and am ready to upload the photos from my camera’s memory card into my photography backup system.
This system ensures that I am following the 3-2-1 rule, and it significantly reduces the likelihood that I will ever lose any of my images.
The following diagram outlines my workflow. Use it to follow along with each step below.
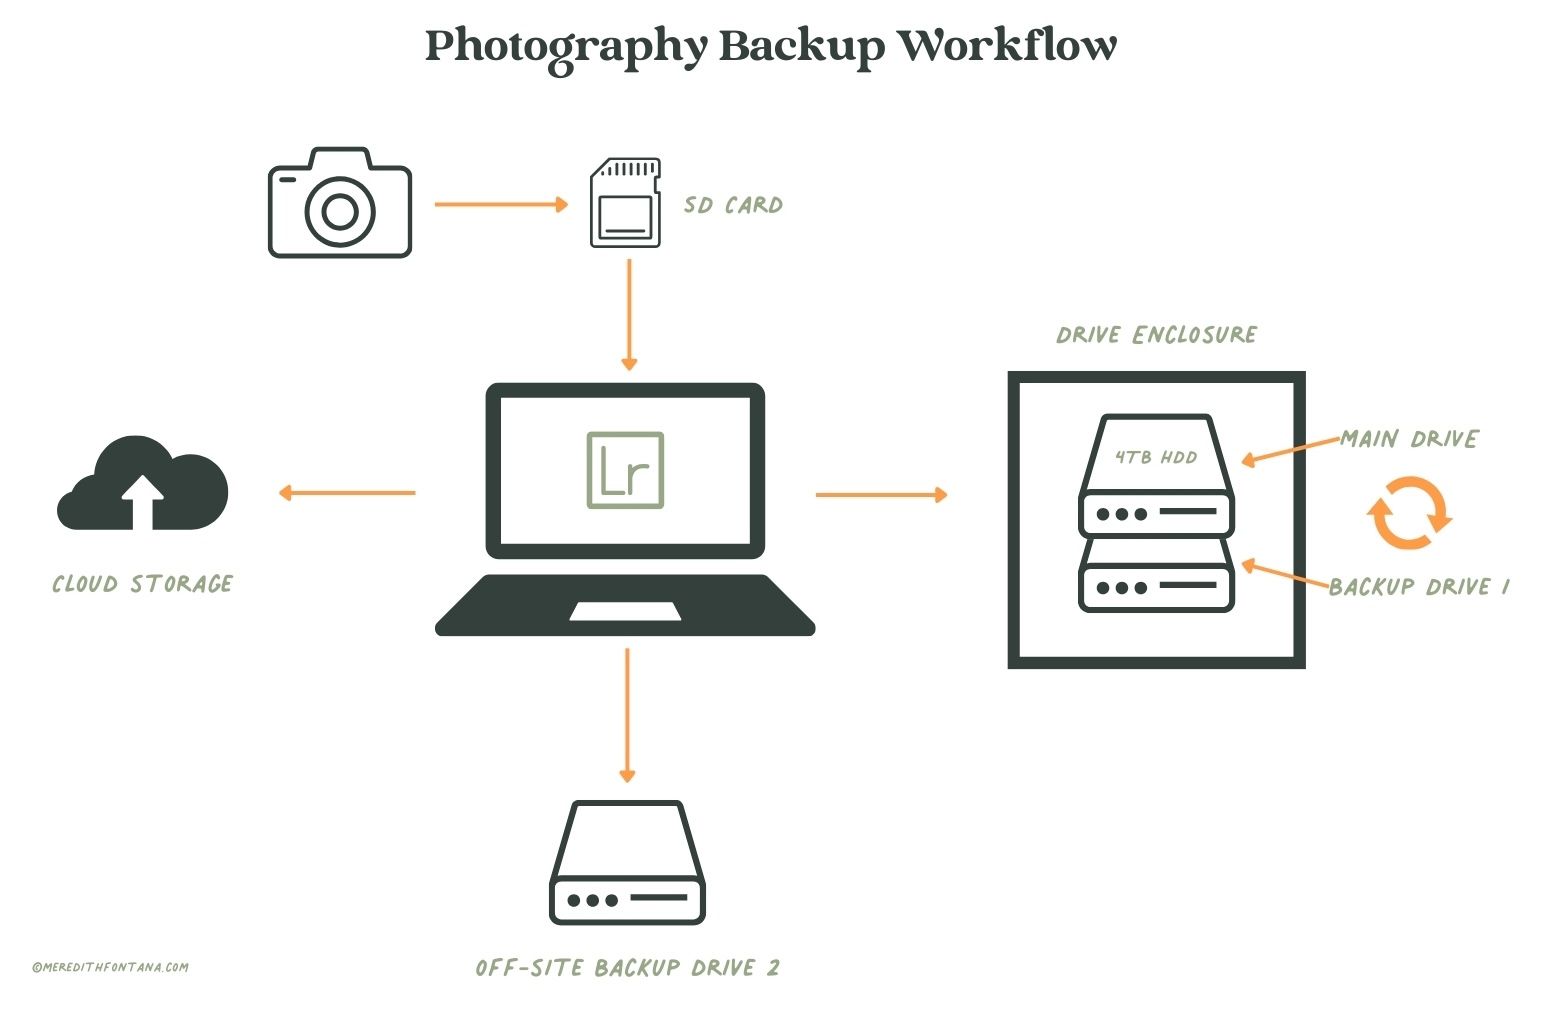
1. Connect hard drive enclosure to computer
First, I plug my hard drive enclosure into my computer using a USB 3.0 cable and turn it on.
My drive enclosure has 4 hard drive bays, and I always have two hard drives docked and connected inside of the enclosure.
One drive is the main drive (where all of my raw photo files are imported), and the second one is the backup drive (where duplicate copies of my photos from the main drive are stored).
The hard drives I use in my drive enclosure are HDDs. The specific type of HDDs I use are called SATA drives. The exact drives that I use are Seagate IronWolf Pro 4 Terabyte SATA drives.
I use these drives because they are relatively cheap for the large amount of data they hold, and they are compatible with both my drive enclosure and NAS systems. You can get these drives with much larger storage capacities - all the way up to 22 terabytes. I don’t use NAS but if I ever get one, I could swap the drives that I use now into the NAS and continue to use them.
2. Plug memory card into computer
Next, I remove the SD memory card from my camera and insert it into my computer.
I use two memory cards inside of my camera when shooting: a CFexpress card and an SD card. The CFexpress card is the main card, and the SD card is set as a backup.
I usually leave the CFexpress card in the camera to keep a safe backup of my images until the entire photo import and backup process that I will describe next is complete.
3. Import images into Lightroom Classic
Next, I open up Lightroom and click “import” on the bottom left corner of the application.
The memory card should appear in the left-hand panel under “Select a source.”
When I import my files into Lightroom, I have my import settings set up so that all of my imported raw files are copied onto a single folder on my main hard drive (see step 1).
I do this to:
- keep all of my raw files isolated in a separate location
- Keep files off of my computer’s internal hard drive so that it doesn’t bog down my computer’s memory
You can set the destination folder that you want your files copied to inside of the “Destination” panel on the right-hand side of the import window. For my exact import workflow and settings, please check out my Lightroom Classic Photo Organization Course.
Tip: Isolating your files is important to prevent them from getting permanently altered or deleted.
I keep all of my raw files (literally every photo I’ve ever taken) isolated in a single folder on my main hard drive. These are never touched, moved, organized, renamed, or even edited. This is to ensure that I always have original copies of all of my raw files in the exact state that they were taken from my camera. Isolating my raw files in this way ensures that I always have an original copy of my files in case one gets deleted or permanently altered during the editing process.
I also do all of my photo editing in Photoshop after exporting a copy of a photo I want to edit into a new folder that is dedicated to storing raw files that I want to edit. This prevents me from permanently altering one of my raw files on my main hard drive and ensures that I always have a backup that is isolated and untouched on my external hard drive.
Tip: Organize your photos in Lightroom, not in folders on your desktop or external drives.
As I mentioned, all of my raw files are held in a single folder on my main external drive (housed in my drive enclosure). This means I store thousands of raw files in a single folder on that drive. I only organize my images in Lightroom using smart collections that reference these raw files on my external hard drive. These collections do not alter or move the files from whatever folder or directory they are stored in, so I never have to worry about my raw files getting moved or lost.
4. Check to make sure photos have been copied to the main drive
After importing the raw files from my memory card into my Lightroom catalog, I check to make sure that all of the files from the memory card have been added to my main external hard drive.
Since I always have my import setting set to “copy” the files on import, I should have copies of the photos I just imported still on the memory card and now also on my main drive.
5. Backup photos on a second hard drive
If everything looks good and the raw files have been successfully copied onto the main drive, I will then use Carbon Copy Cloner to copy all of the raw files on my main drive onto a second external hard drive.
This second drive is the other SATA HDD mentioned in step one that I keep docked with the main drive in my drive enclosure.
The purpose of the second hard drive (or backup drive) is to back up my main external drive.
The goal is to have every file on the main drive duplicated onto the backup drive.
Hard drives can fail, so if my main drive ever fails, I always have duplicate copies of my raw files safe (hopefully) on my backup drive.
Carbon Copy Cloner is an easy-to-use software that will sync the files from your main hard drive to your backup hard drive, making them virtually identical. I have been using this tool for years and it works amazingly well, however, it only works on a Mac. If you use a PC, I’ve heard good things about Acronis for syncing your drives, but I have never personally used it.
Tip: A hard drive enclosure makes it easy to store and sync your main and backup hard drive.
It helps you avoid having lots of external hard drives lying around that you have to plug in individually (at the same time) in order to sync them together.
If you don’t use a hard drive enclosure to manage your drives, you can use Carbon Copy Cloner or another syncing software to sync any two internal or external drives that you want.
6. Create an off-site hard drive backup
As extra insurance and to make sure I’m following the 3-2-1 backup guidelines, I always make a second backup on a third external hard drive that I keep at an off-site location away from home. This counts as an off-site backup (the “1” requirement in the 3-2-1 rule).
I keep this third drive at my mom’s house, which is about 30 miles from my house. About once a month, I will swap a backup drive from home with the backup drive at her house. Once I get the external drive from my mom’s house back to my house, I will sync it with my main drive using Carbon Copy Cloner so that all of the new raw files that I have imported over the last month are copied (but not duplicated) onto the backup drive.
I continue to swap out these backups every month so that I always have an updated backup hard drive at an off-site location.
Tip: It’s a best practice to keep your off-site drive at least a few miles away from your home where you keep your main and second backup drive. This can be at the home of a friend or family member. The point of this is to always have a backup of your images at a separate location in case you lose your two drives at home due to a robbery, fire, etc.
7. Upload photos to the cloud (optional)
As extra insurance and to have a second off-site backup, I upload all of my raw files onto Amazon Photos. This counts as an off-site backup (the “1” requirement in the 3-2-1 rule).
I didn’t always use to do this because large raw files take so long to upload to cloud services. If you don’t have fast internet, I would not recommend uploading your raw files to the cloud.
If you prefer not to deal with uploading photos to the cloud, use the other off-site backup strategy I explain in step 6 above.
As I mentioned in the article (above), I use Amazon Photos because you get unlimited photo storage included in a Prime membership. This is an awesome deal if you have Prime!
Tip: Most cloud services offer a desktop application that you can download to your computer. These allow you to select which drive you would like to sync to the cloud without having to do so through your web browser. I set my Amazon Photos app to sync to my main drive. These apps also let you sync files automatically so that your cloud always stays up-to-date with any changes you make to your main drive.
Final Thoughts
Backing up your photos can seem like a mundane task that is easy to put off, but it is an essential practice that will save you lots of headaches and heartaches.
Remember, hardware fails and accidents happen unexpectedly. Nobody thinks they will lose their photos until it happens to them.
Staying proactive with your backup workflow every time you import photos from a new photo shoot or trip is the key to maintaining peace of mind that you will never lose your precious data.
Whether it's utilizing external hard drives, NAS, cloud services, or a combination of all three, the investment in safeguarding your photographs is an investment in safeguarding your story and even your livelihood if you are a professional.
I hope this article helped you out. If it did, I’d love to hear from you.
What backup workflow do you use? Do you have any advice for other photographers or something you think I missed? Let me know your thoughts!